Ortlieb Panniers
All content copyright © 2010-2024 Frank Revelo, www.frankrevelo.com, United States copyright office registration number TX-7931345
Ortlieb Back Roller Plus rear panniers, purchased originally from Cyclo Camping. Spares, including extra lower QL2 anchoring hooks, can be purchased either from Cyclo Camping, Thorn (aka SJSCycles), or direct from Ortlieb. Final weight per rear pannier, after modifications below, is 900g or slightly less than unmodified pannier weight of about 940g. In other words, removed compression straps and zippered pocket weigh slightly more than added liner and lower UL2 hook.
Fabric of the Back Roller Plus model is more durable than that of the Back Roller Classic model, but somewhat less waterproof. Waterproofness is not very important to me for two reasons. First, I tour mostly in dry climates. Second, and more importantly, it is easy for moisture to get into a pannier even without leaks in the fabric, either from drips in the water bladders I store in the panniers, or from moisture picked up when objects are placed onto damp ground before placing into the pannier, or if the panniers must be opened while it is raining, in order to retrieve objects. So relying on panniers to be totally waterproof is not wise. Electronics and food stored in panniers should be additionally protected against moisture by waterproof plastic, such as Aloksaks or Opsaks, since even a small amount of moisture is bad for electronics and food. For clothing, a small amount of moisture should be no problem. The Plus models of panniers are significantly lighter weight than the models with all sorts of pockets. Pockets are not needed if you organize your gear properly. Pockets make panniers less waterproof. [After over 19000 miles / 30500 km of touring usage, both panniers leaked when left in the rain at night, so that there was some water inside in the morning. No damage to food or electronics inside the panniers, because these were protected by plastic or dry sacks. Otherwise, the panniers are still holding up find and so I don't plan on replacing them anytime soon, given how infrequently I encounter rain while bicycle touring.]
For very long tours, it might be wise to carry a spare upper attachment hook in the repair kit, given that breakage is possible and would be a disaster. Torn pannier fabric is actually much more likely to occur, but wouldn't be a disaster, since fabric can be easily mended with needle and thread or duct tape. Breakage of a lower attachment hook is also possible, but wouldn't be a disaster if using two lower hooks, as recommended below.
Broken handle
The nylon webbing carrying handle tore after about 300 days of touring, but these handles are designed for easy field repair: unscrew, cut the worn piece off, optionally sear the end with a flame to prevent unraveling, screw back together.
Broken buckle
The side-release buckle on one of my panniers also failed after about 300 days of touring, as shown below, and then a side-release failed on the other pannier on the next tour, after about 350 days of touring. These side-releases cannot be replaced in the field, because they are sewn-in, though they can be replaced with the aid of a sewing machine. Both times, side-release did not break completely, and continued to work until I finished my tour, in the partly broken state shown in the photo. Even if the side-release had broken entirely, it would have been possible to rig the pannier to stay shut in a variety of ways. One of those ways involves using the side-release on the other strap on that panniers. So when replacing a side-release that breaks, be sure to replace the other side-release on that pannier as well, to be prepared for future breaks, since not all side-releases are compatible. It is possible to carry a spare 1" side-release in the repair kit, to allow fixing the panniers at the next town with a tailor or shoe repair shop or other access to a sewing machine.

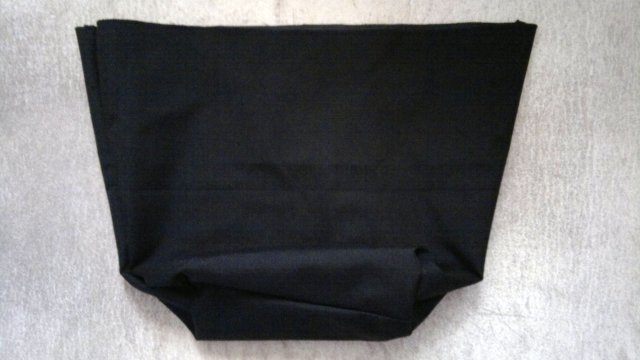
Compression straps removed
Didn't need them, so got rid of them.
Liner to replace inner pocket
Ortlieb panniers come with zippered pocket, which also protects contents of pannier from heads of bolts used to hold pannier together. Over time, these bolt heads can wear through fabric of pocket. Since I wasn't using the pocket, I trimmed most of it away, other than top 4" of back surface, and replaced with 1000d cordura liner, which can be easily replaced as it wears through.
Cut 2 squares of 1000d cordura, 22" wide by 18" high. Trim sides to make trapezoids 22" at top, 16" at bottom, 18" high. Stitch together on sides and bottom with 3/8" seam, zigzag seam allowances. Square off bottom about 9" wide by 6" deep, trim corners leaving 3/8" seam allowance, zigzag seam allowance. Zigzag top edge.
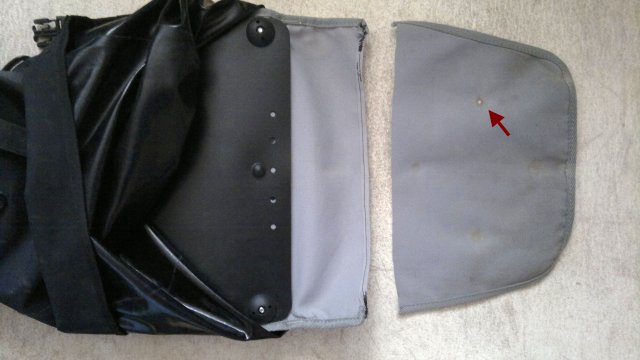
Left of photo shows pannier after trimming pocket and also shows upper bolt heads, which are smooth but nevertheless capable of causing abrasion over time. Right of photo shows wear on pocket from lower bolt head.
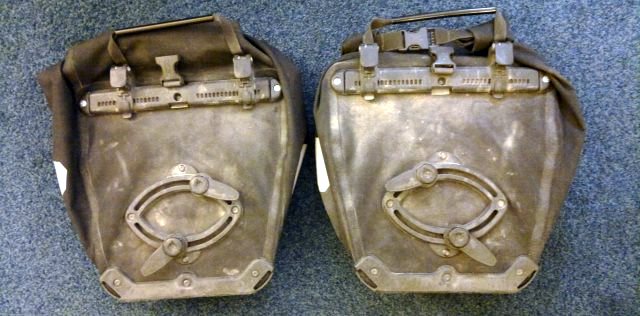
Extra UL2 hooks
Panniers come with a single UL2 lower anchoring hook. When used with the Thorn expedition racks, this single hook must be positioned to point mostly horizontally, either forwards or backwards, but this is not a very secure attachment. If the hook points forwards, the lower rear of the pannier will not be well-secured to the rack and will tend to bounce around, and vice-versa if the hook points backwards. Over time, movement of the unsecured lower portion of the pannier will stress the single hook and cause it to break. So if you are using these panniers with Thorn racks, like me, then I highly recommend adding a second hook, as shown below. Same logic probably applies to other racks.
Other modifications
QL2 upper attachment rail can be tilted to give more heel clearance, but I recommend against this, since it tends to stress the fabric. Better solution is to simply move the panniers further back. Better still, get a bike with extra long chainstays, like the Thorn Nomad.